


")
Have you ever tried to log in to a WiFi network on your Android phone only to be greeted with a WiFi authentication error, by using the same username and password? It’s perfectly natural, and it happens even though you’ve already linked to the WiFi network. This issue isn’t always serious, and it can usually be resolved quickly. Let’s look at why this occurs as you want to communicate and how we can solve the WiFi authentication error.
Any time you connect to a Wi-Fi network with your smartphone or laptop, you must first complete Wi-Fi authentication. You’ll need the password to authenticate yourself and bind to the secured Wi-Fi network. However, if you’ve entered the right password and are still having issues with WiFi authentication error, Here’s what you need to hear about WiFi authentication error.
Why does a WiFi Authentication Error happen in Router?

When your Android phone can’t connect to a WiFi network when you try to connect, even though you’re using the right password or if you’re in airplane mode, you’ll get the WiFi authentication error. If you’ve already connected to the WiFi network, your handset will connect to it automatically in usual circumstances.
If the signal is unreliable, you can experience problems, which can be alleviated by using mobile phone signal boosters. If you unintentionally allow Airplane mode in your network settings, your Android device will be unable to connect to any network. However, often the authentication issue is caused by more than just the phone being in airplane mode. Four of the most important causes of a Wifi authentication error are as follows:
• Router breakdown
• Unstable network link
• The number of users who can connect to the WiFi network is restricted
There are a few basic methods to the WiFi authentication problem. The best solution is determined by the source of the error. The below are some of the most popular remedies and methods for resolving the error that you should use right now.
1. Forget about the Network
Resetting the WiFi link in your network configuration is the most popular workaround for a WiFi authentication error or to address an authentication bug. You can do this by missing the network name (the one in which you’re having trouble connecting) on your Android smartphone before attempting to reconnect.
Here’s how to go about doing that.
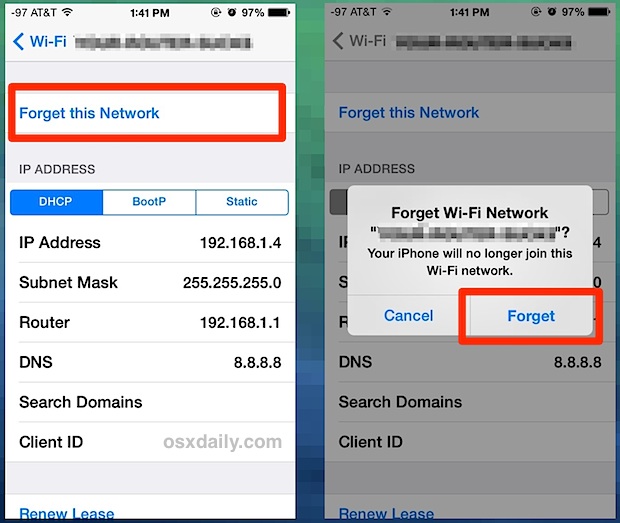

Step 1: In the options menu, choose Wifi:
Look for “Wireless & networks” in your phone’s Settings. Instead, several smartphones have “Connections.” Go to the WiFi alternative by tapping this.
Step 2: Locate the network that is causing you problems:
Pick a network that you’ll forget about. When you go to your network settings and choose WiFi, you’ll see a list of local WiFi networks, including the ones you’ve already linked to. Tap the name of the network for which you’re having trouble linking.
Step 3: Choose “Forget network” from the drop-down menu:
When you choose a network, the network configuration will have a “Forget network” feature. To reset the configuration of the chosen network, tap this. After the password has been reset, link to the network and attempt to access it. The authentication password will be used. To bind, simply type in the password. If this stage does not resolve your Android WiFi authentication error, proceed to the next.
2. Switch from DHCP to Static on the Wireless Network
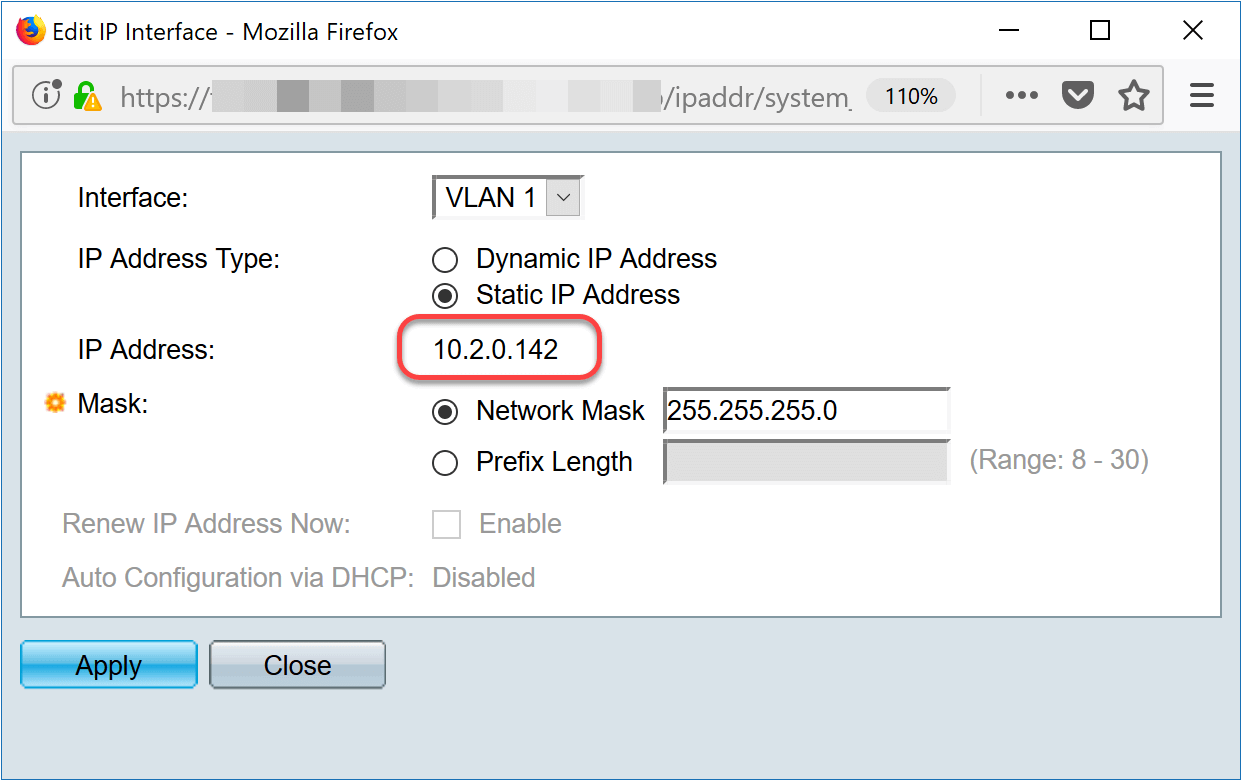

Step 1: Go to the WiFi section of the configuration menu, Select a network. Look for the attachment you want to alter in your Android device’s WiFi settings.
Step 2: Tap the network to which you’ve linked. A list of nearby WiFi networks will appear. Simply choose the wireless network you’re having trouble connecting to (or the one you want to connect to) and push the connect button.
Step 3: Make changes to the network Configure the network configurations. You’ll either see a Modify or Manage network selection when you click the wireless network. It should be tapped.
Step 4: Set the network to “Static” mode. On your Android smartphone, you’ll find an “Advanced Settings” option in the WiFi settings. Look for “IP Settings” under this option. Shift the IP address from DHCP to Static. Finally, in the area, type the IP address (found on the back of the router). Then save the changes and reconnect. For the most part, this resolves the WiFi authentication error; if it doesn’t, try the other moves.
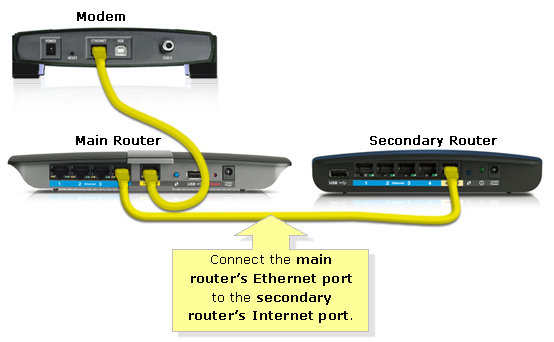
3. Switch on the Modem
If the first three methods failed to resolve the WiFi authentication error, the problem could be with your router. It’s possible that restarting the router would fix the problem and recover the internet connection. Depending on the kind of router you have, there are three ways to restart it. The following are the details:

Step 1: Unplug the power cord:
Disconnecting the power cable is the simplest and most popular way to restart a standard router. The router will be turned off if you do this. Reconnect the power cable and switch on the router after a few minutes have passed.
Step 2: Use the power button or a warm reset to restart:
If you have a wall-mounted router, though, there is another way to reset it. Since disconnecting the power cable is difficult, you can instead turn the router off by pressing the power button. The warm reboot can also be used to automatically reset the link.
Step 3: Adjust the contacts that are permitted:
If you have an internet link but can’t communicate, it’s possible because there are already so many users connecting to the router and you’ve hit the limit number of connections authorized. Simply increase or decrease the maximum number and restart the router. Restart the computer after restarting the router to see if the WiFi authentication error persists. If the error persists,
4. Restore Factory Defaults
If the first three methods fail, or if your phone displays any random errors in addition to WiFi authentication errors, your phone might be experiencing device problems. When you load a software upgrade, a custom ROM, or a corrupted program, this happens.
Before you do a factory reset, I suggest clearing the app cache of any recent apps you’ve downloaded, particularly if you granted the app permission to access your network.
Resetting your handset to factory settings is the easiest way to solve device bugs and restore settings. However, this comes at the expense of erasing all of your records. Just make sure you’ve made a backup of your records. The easiest way to do this is to make a cloud copy of your phone first. After that, you’ll be able to reset your device’s settings. Simply follow the measures shown below:

Step 1: Choose “Backup & Reset” from the drop-down menu:
Simply go to settings and scroll down to the “Backup & Reset” function. To open it, just tap it.
Step 2: Allow automatic restoration:
You’ll see the option for Automatic Restore. Made sure it is turned on if it isn’t already.
Step 3: Factory data must be reset:
Locate and tap the “Factory Data Reset” choice. Then validate the operation by tapping the “Reset Phone” button. It will only take a few minutes to complete the process. This will restart the phone’s operating system. If the issue is caused by machines, you should be able to connect to the network. Unless your phone has a hardware malfunction, this should resolve your WiFi authentication error.
Conclusion
These are the most effective methods for resolving the authentication problem. We hope that after trying the above methods, your computer was able to connect to the desired wireless network. You must closely follow the steps in order to solve this dilemma, or you can use Fixppo for Android. The authentication error can happen at any moment, so you now know what to do if it happens again.


