


This post will explain Why is Alexa not reading my calendar. Do you constantly forget your consultation schedules regardless of composing them out in a journal? Do not fret, Alexa can assist keep up with your schedules no matter where your calendar is hosted. This short article will direct you on how to synchronize your calendar with Alexa using Google, Microsoft Exchange, Microsoft Office 365, Microsoft Outlook, or Apple calendar.
Considering that you understand Alexa has a great deal of multi-functional functions, integrating your calendar is one of them too. In other words, Alexa can assist organize and figure out your consultations by integrating with your calendar. To review upcoming events, in addition to add new ones, without utilizing anything, simply your voice and an Alexa-enabled device, you require to combine your virtual agenda initially.
How You Can Synchronize your Calendar with Alexa Easy Guide
In this article, you can know about Why is Alexa not reading my calendar here are the details below;
With Alexa integrated with your calendar, you can rest assured that you can never miss any other visit again. Have a look at the actions listed below to synchronize your calendar with Alexa Note that Alexa deals with different calendar types, like Microsoft 365, Apple iCloud, Google Gmail, and Outlook.com.
It’s likewise possible to synchronize a corporate Microsoft Exchange calendar with it in case your business has an Alexa for Business account. Also check How to improve communication skills
This post will assist you through how to synchronize your iCloud calendar with Alexa, synchronize your Microsoft Calendar With Alexa, synchronize your Google calendar, and likewise manage calendars and schedule meetings. It will likewise reveal you ways in which you can protect your calendar.
How to Synchronize Your Calendar With Alexa.

Follow the actions below to synchronize your calendar with Alexa:
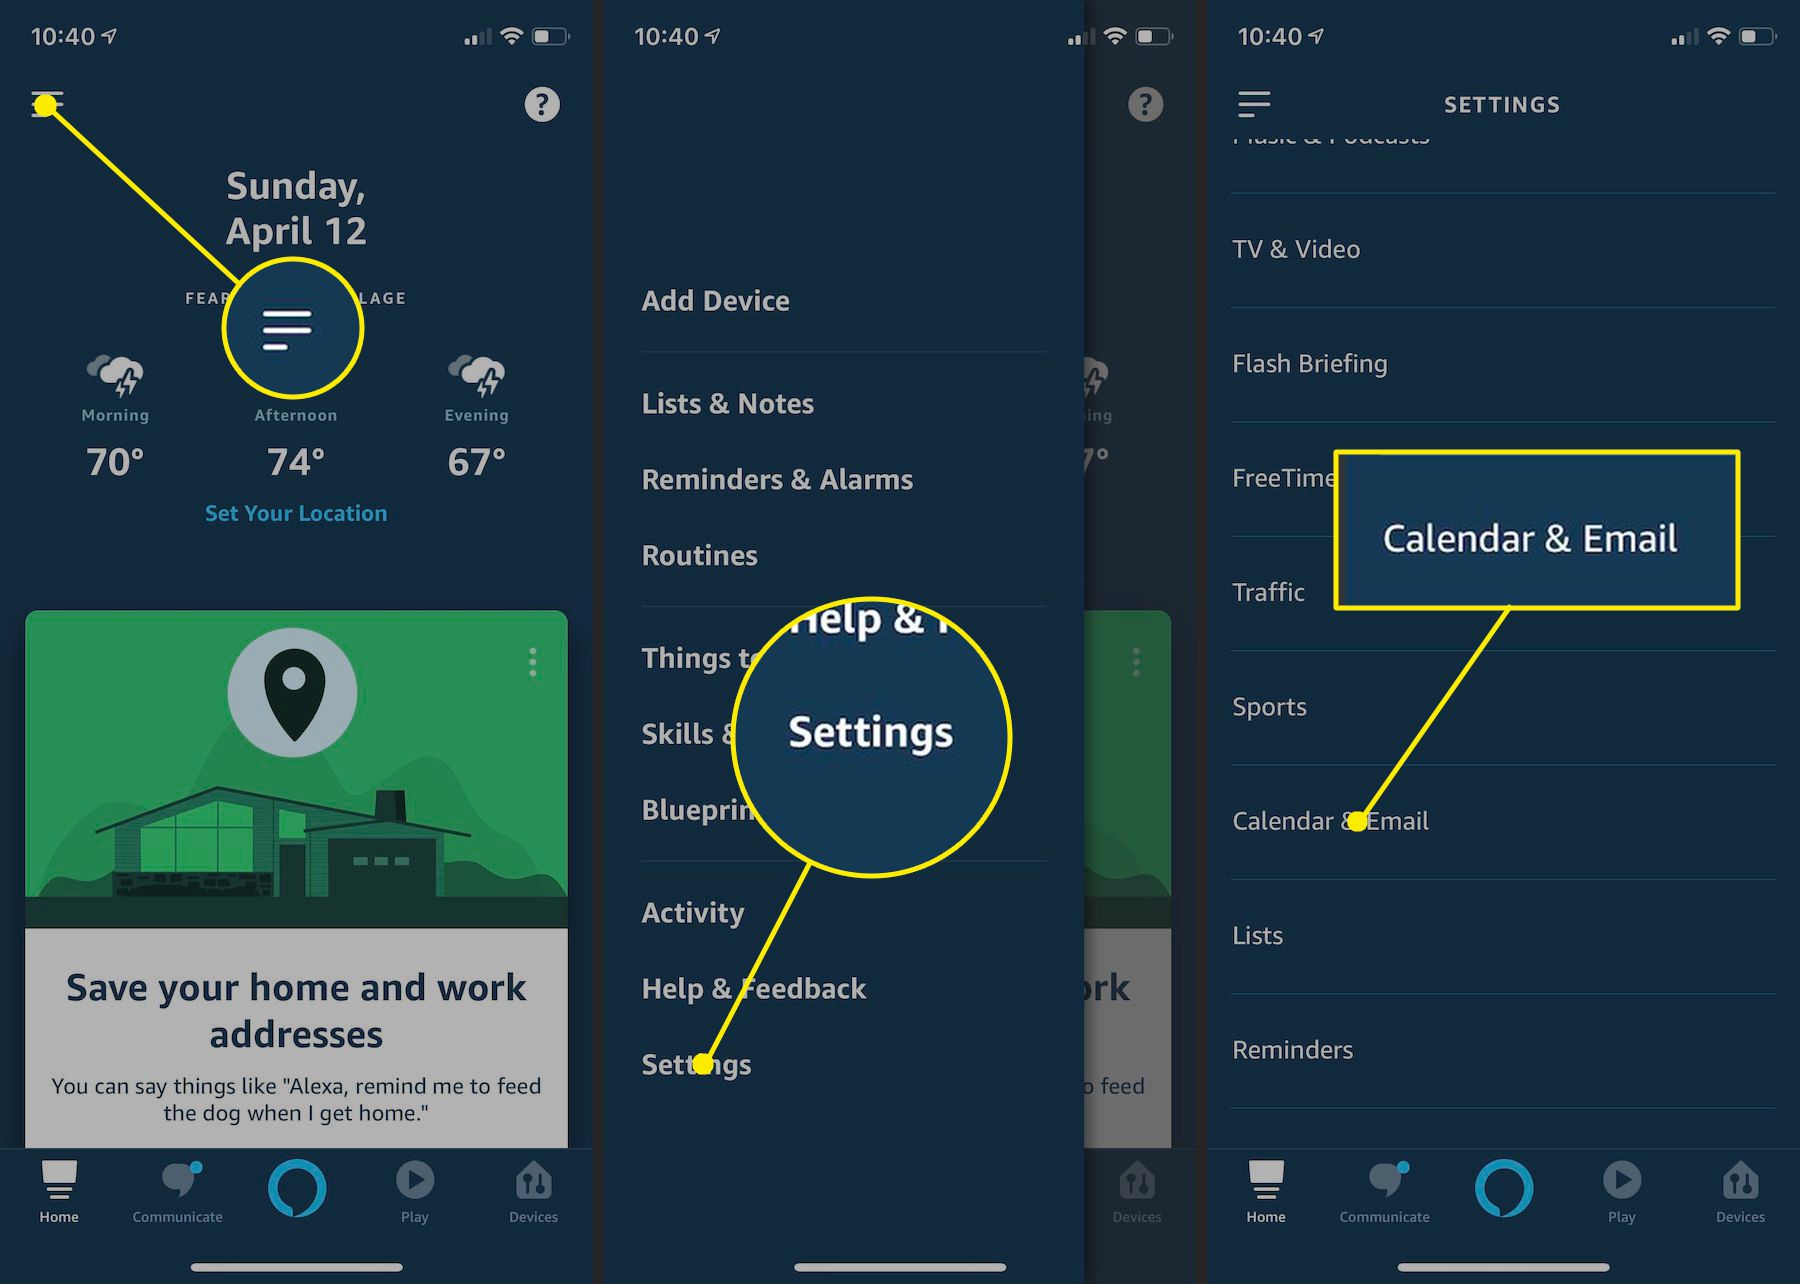
– Set up the Alexa app on your mobile phone.
– Click on the Menu button (the hamburger button that looks like 3 horizontal lines at the upper-left corner).
– Navigate to Settings.
– Navigate down and click on Calendar & Email.
– An alternative on the type of account to connect to will be displayed on your screen, whether Google, Apple, or Microsoft.
– Choose the calendar account you want to synchronize (This is the specific level where you can synchronize numerous calendars to your Alexa).
– Click on “Connect Account”. You can likewise link an email account, depending upon which account you select.
– That’s it! Now you have effectively had the ability to synchronize your calendar with Alexa
How to Synchronize iCloud Calendar With Alexa

It is required to make the two-factor authentication on your Apple account active and also produce an app-specific password prior to synchronizing your iCloud calendar with Alexa
– From your gadget’s home screen, open Settings.
– Towards the top of the screen, choose your name.
– Click on Password & Security.
– Find the Two-Factor Authentication option (If it’s not active yet, choose this choice and follow the on-screen guidelines offered to end up the process.
– Navigate to appleid.apple.com.
– Input your Apple account name and password and click Enter or select the best arrow to log in.
– You will receive a six-digit verification code on your iOS device. Input this code in your preferred web browser to complete the authentication process.
– Your Apple account profile will be visible now. Navigate down to the Security area and click on Generate Password in the App-Specific Passwords area.
– A pop-up window will be shown, directing you to input a password label. Enter Alexa in the field offered and pick to Create.
– Your app-specific password will now be displayed. Save this in a safe place you can constantly refer to later on and click Done.
Now, that the two-factor authentication has been activated and your app-specific password remains in place, then it’s time to synchronize your iCloud calendar.

– On your mobile phone or tablet, open the Alexa app.
– Click on the Menu alternative, represented by three horizontal lines found at the upper-left corner of the screen.
– Once the drop-down menu is displayed, click Settings.
– Navigate down within the Settings menu and choose Calendar & Email.
– Choose Add Account.
– Click on Apple.
– Right under Allow Alexa to access the following Apple Services: Calendar, click on Next.
– You will be directed to switch on two-factor authentication (However considering that this has actually already been finished, click Next).
– You will be triggered to get in an app-specific password (But given that you have finished this currently, click on Add Apple Calendar).
Readily available iCloud calendars like Home and Work will be displayed. Guarantee you make any other required changes so that all calendars you wish to connect to Alexa will have a checkmark beside their matching names. That’s it!
How to Sync Microsoft Calendar With Alexa.
Follow the guidelines below thoroughly to synchronize a Microsoft 365 calendar with Alexa or to connect a personal Hotmail.com, Outlook.com, or Live.com account. Also check Content operations
– On your smart device or tablet, open the Alexa app.
– Click on the menu icon, illustrated by 3 horizontal lines found at the upper-left corner of the screen.
– Once the drop-down menu is shown, click Settings.
– Navigate down within the Settings menu and click Calendar & Email.
– Tap on Microsoft.
– Click on Calendar right under “Allow Alexa to access the following Microsoft services”, then pick Next.
– You are asked by Microsoft to confirm access to your account with the Alexa app. Click on Yes to continue.
– Enter the e-mail address or telephone number linked to your Microsoft account and click Next.
– Input your Microsoft account password and click the Sign-in option.
– You will receive a verification message mentioning that Alexa is now prepared to use your Microsoft calendar. Click on X to finish the procedure.
How to Synchronize Your Google Calendar With Alexa.
Follow the actions below to synchronize a Gmail or Google Workspace calendar to Alexa. In case you are integrating a Google calendar, you need to pick which Google account you wish to sync and also permit authorizations:
– On your smart device or tablet, open the Alexa app.
– Tap More (3 horizontal lines) in the lower-right corner.
– Select Settings
– Scroll down within the Settings menu and pick Calendar & Email.
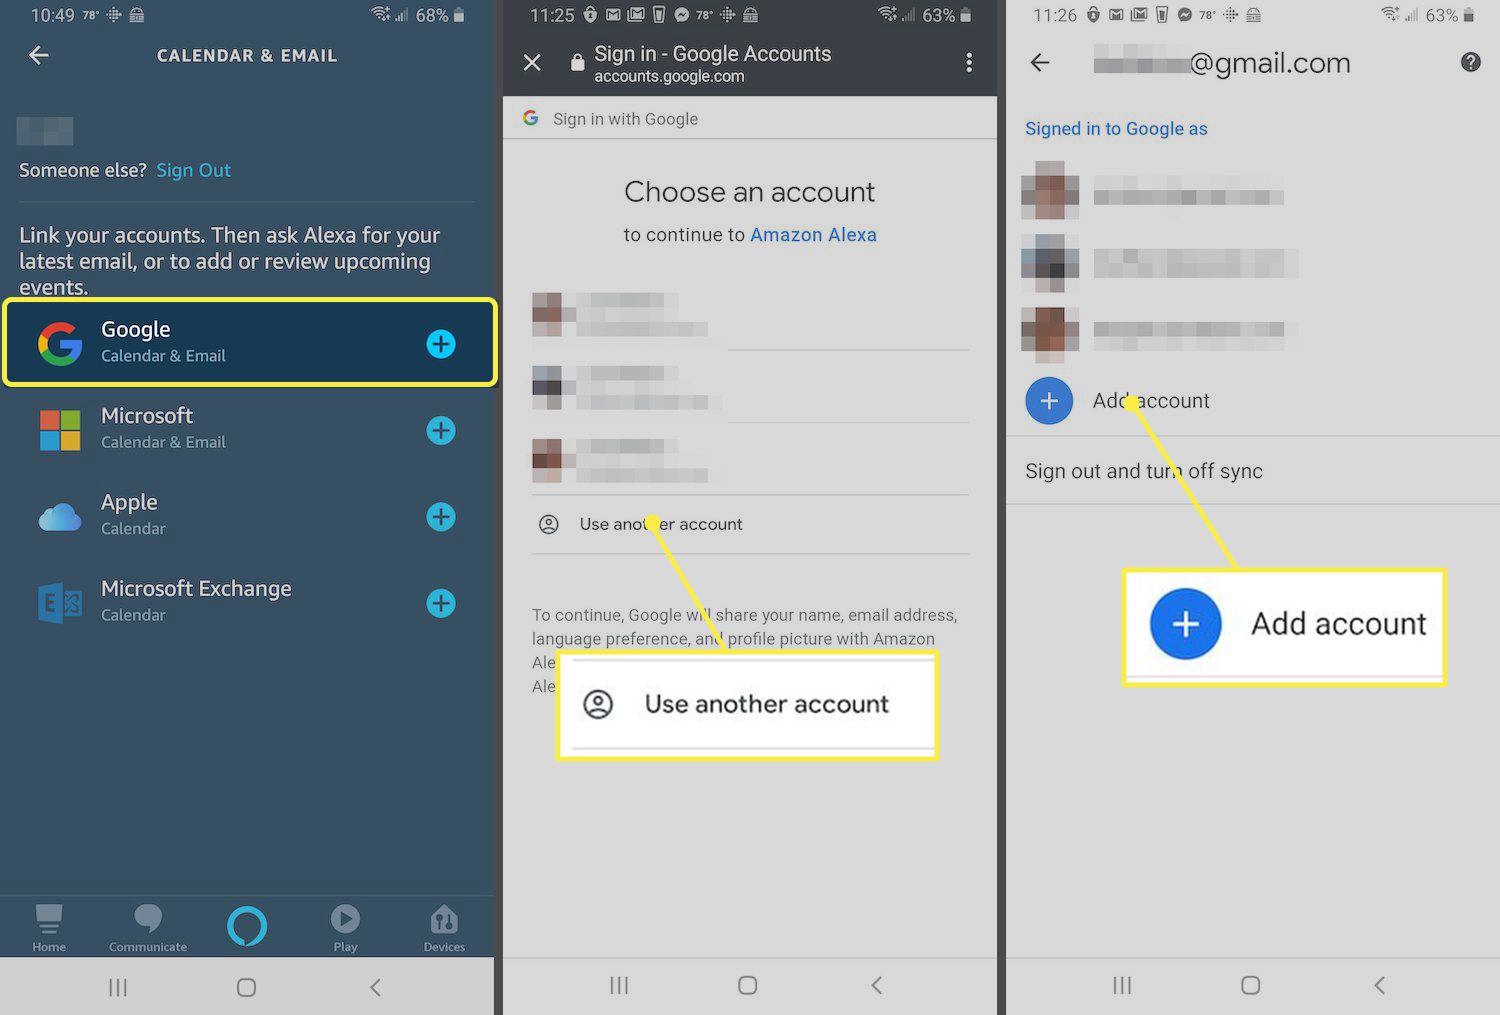
– Select Google.
– At this point, you may be presented with a list of Google accounts that are related to Alexa for another function or skill. If so, select the one which contains the calendar you desire and select Link this Google account. If not, choose Use another account.
– If the account isn’t noted, choose Add account. Supply the e-mail address or contact number related to your Google account and choose Next.
– Enter your Email or phone and choose Next.
– Enter your Google password and choose Next again.
– Under the Google Terms of Service, choose I agree
– Alexa demands access to manage your calendars. Select Allow to continue.
– You will get a verification message, letting you know Alexa is ready to use with your Google calendar. S.
– select Calendar.
– Select Done or the X icon to complete the process and go back to Settings.


How to Manage Your Calendar With Alexa.
After you have been able to synchronize your calendar with Alexa, now you can have limitless gain access to or control over its contents utilizing the following voice commands, you might state:.
– Show me my calendar.
– What is on my calendar?
– When is my next occasion?
– What is on my calendar on (day of the week)?
– What’s on my calendar tomorrow at (time)?
– Add an occasion to my calendar. (In case you wish to be more specific with this command, you can make use of any of the following syntaxes: Add (occasion name) to my calendar for (day) at (time).
– Delete (event name) from my calendar.
– Delete my (time) event.
– That’s it! Now, you can manage your calendar effectively with Alexa with no hassle. So easy!
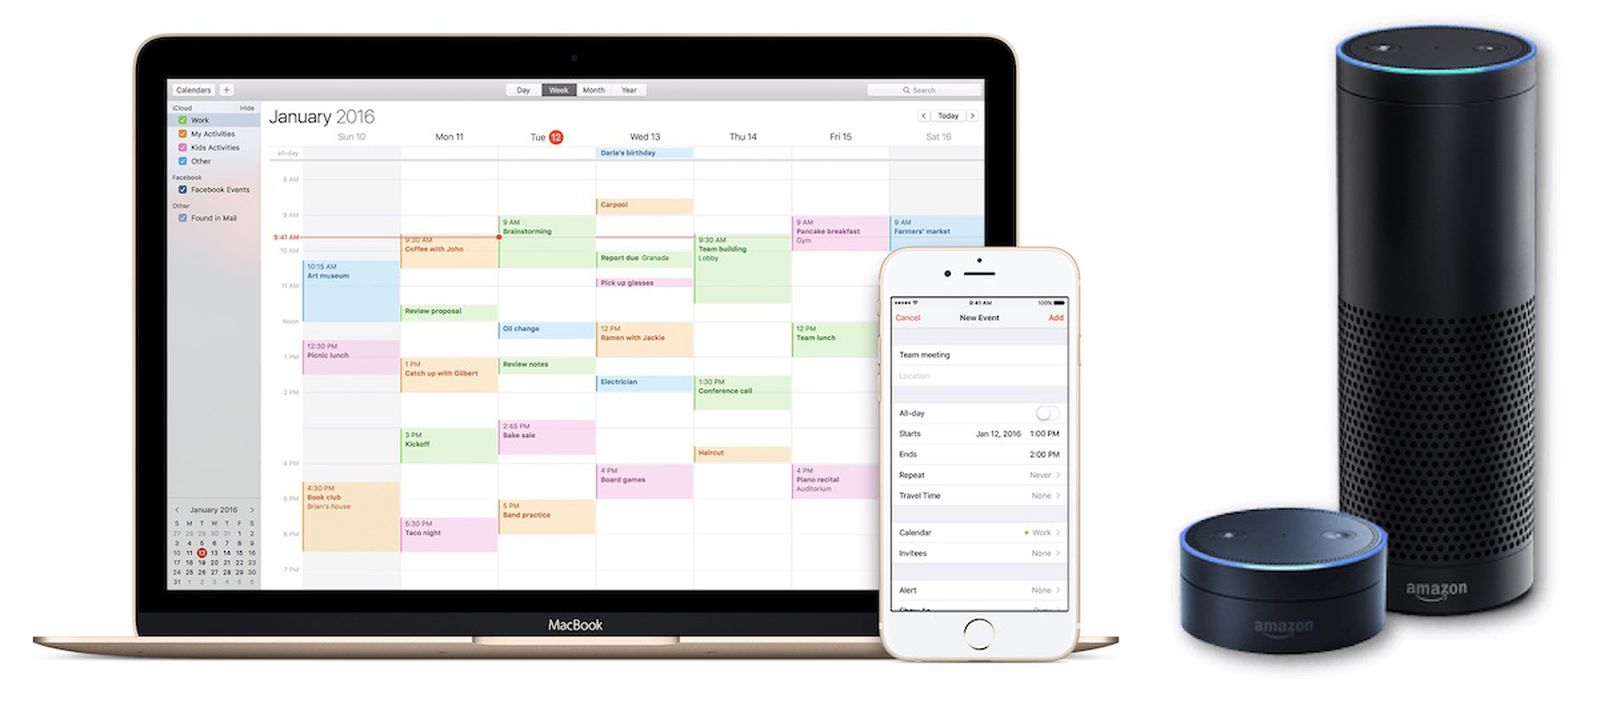
You have had the ability to synchronize your Calendar with Alexa now, it will be able to read what’s on your plate consistent. Just ask her what you have arranged for the day, and you will not miss your appointment. After the Alexa is set up to manage events in your calendar, then you will be able to handle your schedule even better. However, you might reschedule a conference or cancel it. You can likewise produce appointments by trying the above-listed Alexa commands.
How to Schedule a Meeting by means of Alexa.
It is possible to schedule a conference with another individual utilizing Alexa and your calendar after checking out the commands above. However, you require to very first activate Alexa Calling and Messaging by following the actions below:.
– On your smart device or tablet, open the Alexa app.
– Click on Communicate, situated at the bottom of the screen and illustrated by a speech balloon.
– The Alexa app might request for authorizations to your device’s contacts.
– Grant this gain access to and follow any prompted directions to make it possible for Calling and Messaging.
You can use these common voice commands below with this function:.
– Generate a meeting called (conference name) with (contact’s name).
– Organize a lunch with (contact’s name) for twelve noon tomorrow.
You will also be asked by Alexa if you will like to send out an e-mail invitation after starting a conference request.
How to set your Calendar Security.
To synchronize your calendar with Alexa is convenient and simple, however, there could be a personal privacy issue in case you are worried other individuals in your home or workplace could access your contacts or consultation details. One easy method to avoid such a possible issue is to restrict calendar access based upon your voice. Pursue the steps listed below to set a voice limitation for your Alexa-synchronized calendar:.


– On your mobile phone or tablet, open the Alexa app.
– Click on the Menu icon, portrayed by the three horizontal lines located at the upper-left corner of the screen.
– Immediately the drop-down menu is displayed, click Settings.
– Navigate down within the Settings menu and click on Calendar & Email.
– Simply choose the connected calendar you want to include a voice constraint to.
– Navigate to the Voice Restriction section and click Only My Voice.
– That’s all. Very simple!
Was this post helpful? I understand how irritating it could be after duplicated efforts to document suggestions, and you still end up forgetting such appointments. Also check Digital customer onboarding
Fortunately, Alexa is here and has assisted fix such problems, say goodbye to will you miss your meetings and schedules. Alexa will remind you and assist you manage your time more efficiently and optimally.
However, Alexa can do more than help you synchronize your calendar with Alexa, you can take a look at all the other amazing things Amazon Alexa can do here.


